Disclaimer: while utilizing these guides can provide alignment with HITRUST, it is still your responsibility as an organization to complete an audit and obtain certification.
The Business Associate Agreement (BAA)
Google Cloud Platform requires users to contact their account manager to get a BAA signed. From Google:
“Execute a Google Cloud BAA. You can request a BAA directly from your account manager.”
Only once you’ve signed the BAA and subsequently configured your SQL database to be compliant should you start accepting PHI.
More on BAAs can be found in the Datica Academy.
| Rule | Header |
|---|---|
| HIPAA § 164.308 | N/A: GCP does not provide an API to the BAA |
Working with VPC networks
Before we jump into creating our SQL instance, first we’re going to create a new VPC and subnet. Creating a network and a subnet is very simple with GCP. Follow these steps.
- In the left side navigation find “VPC network” under the “Networking” heading
- Above the table of default networks, click the “Create VPC network” button
- Fill out the name, and description fields and then select “Subnet creation mode” under the “Subnets” section
- In the box titled “New subnet” fill out a name
- The region should be the same region as the database
- For the IP address range, you should use a standard private VPC network address range
- For “Private google access” which indicates: “ …whether VMs in this subnet can access Google services without assigning external IP addresses “ select “Off”
- Set flow logs to “On”
- Set “Dynamic routing mode” to “Regional”
- Click “Create”
| Related Control(s) | API Reference |
|---|---|
| HITRUST 0805.01m1 Organizational.12 | subnetworks , networks |
Creating the database
Now that we have a network and subnet, we can create our database. To do that, click the menu button in the top left and follow these steps:
- Select “SQL”
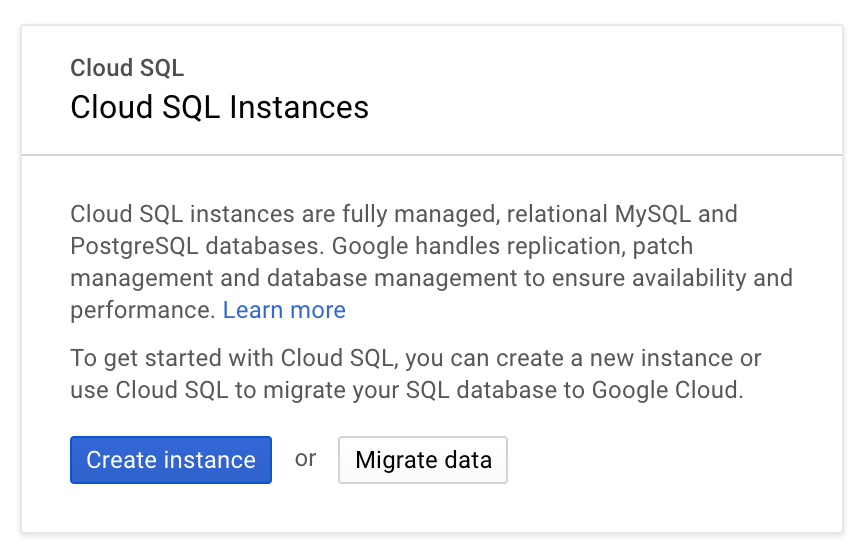
- At the following prompt, select “Create instance”

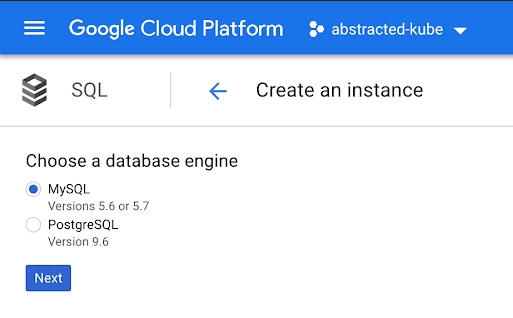
- Make a selection for “MySQL” or “PostgreSQL”
- Enter the information for “Instance ID”, “Default user password”, “Location”, “Region” and “Zone”
- Select the “Show configuration options” link
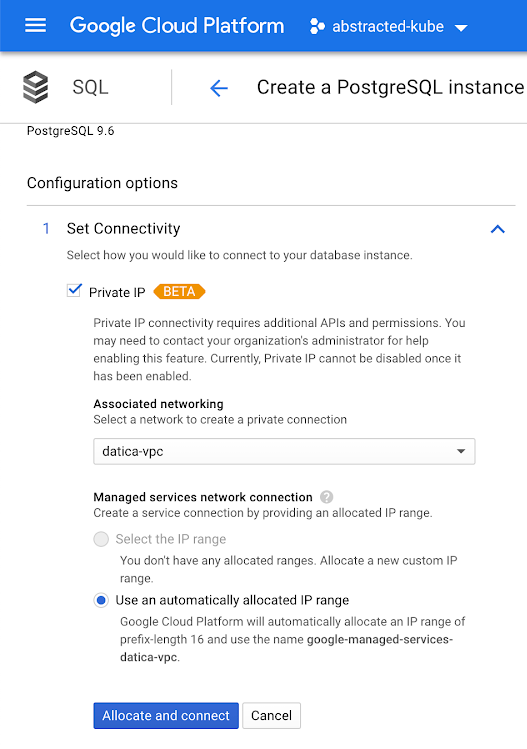
- Under “Set Connectivity” select “Private IP” (enable the API if you haven’t already)
- Under “Private IP” select the VPC we just created in the previous step

- If “Public IP” is checked be sure to uncheck it
- In the “Enable auto backups and high availability” section, select “Automate backups”
- In the same section under “Availability” select “High availability (regional)”
- Next, under the “Set maintenance schedule” section be sure to select the window and timing that’s appropriate for your internal policy
- Then click “Create”

High availability
In the previous step where we created our database, we were able to setup high availability across multiple regions. This aids in both disaster recovery and business continuity for your organization. If a region within GCP goes down, high availability will ensure that your data is still accessible from another region.
For more information on high availability from the GCP, see this article.
| Related Control(s) | API Reference |
|---|---|
| HITRUST 1616.09l1 Organizational.16 | Databases: get, BackupRuns |
| HITRUST 1618.09l1 Organizational.45 | Databases: get, BackupRuns |
| HITRUST 1619.09l1 Organizational.7 | Databases: get, BackupRuns |
| HITRUST 1620.09l1 Organizational.8 | Databases: get, BackupRuns |
| HITRUST 1668.12d1 Organizational.67 | Databases: get, BackupRuns |
Database access & encryption
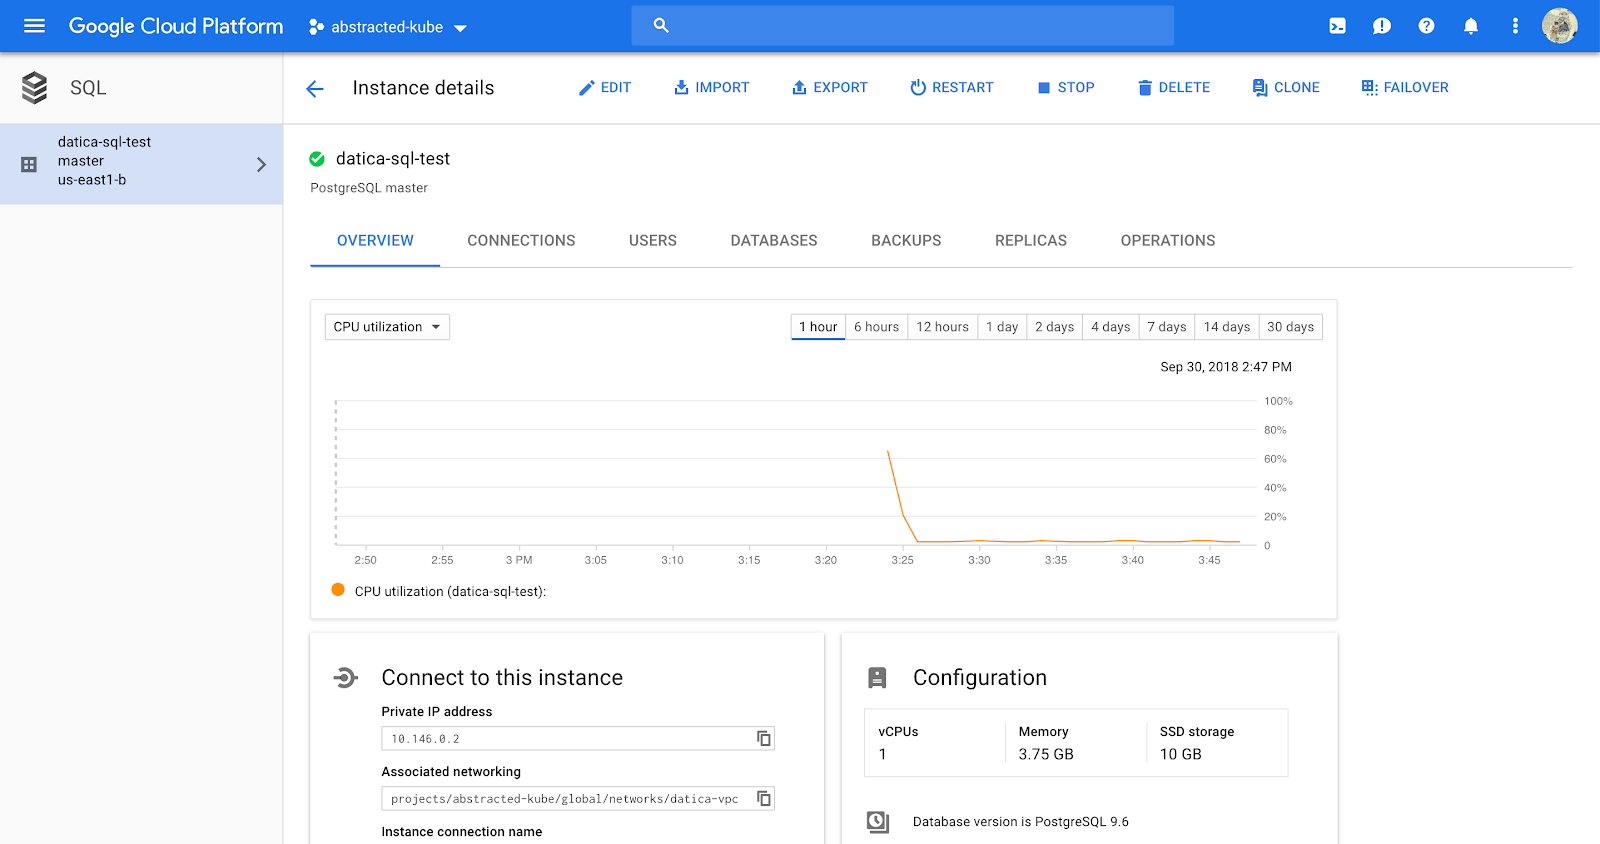
When we created the database in step 3, we selected “Private IP” and unselected “Public IP”. This restricts traffic to the instance only to approved networks. This is important because it forces all traffic to be encrypted and authenticated.
More information on Private IP can be found here.
Connecting over SSL/TLS
From Google:
“If you are connecting using private IP, configuring SSL/TLS is optional; private services access traffic stays within Google’s network at all times.”
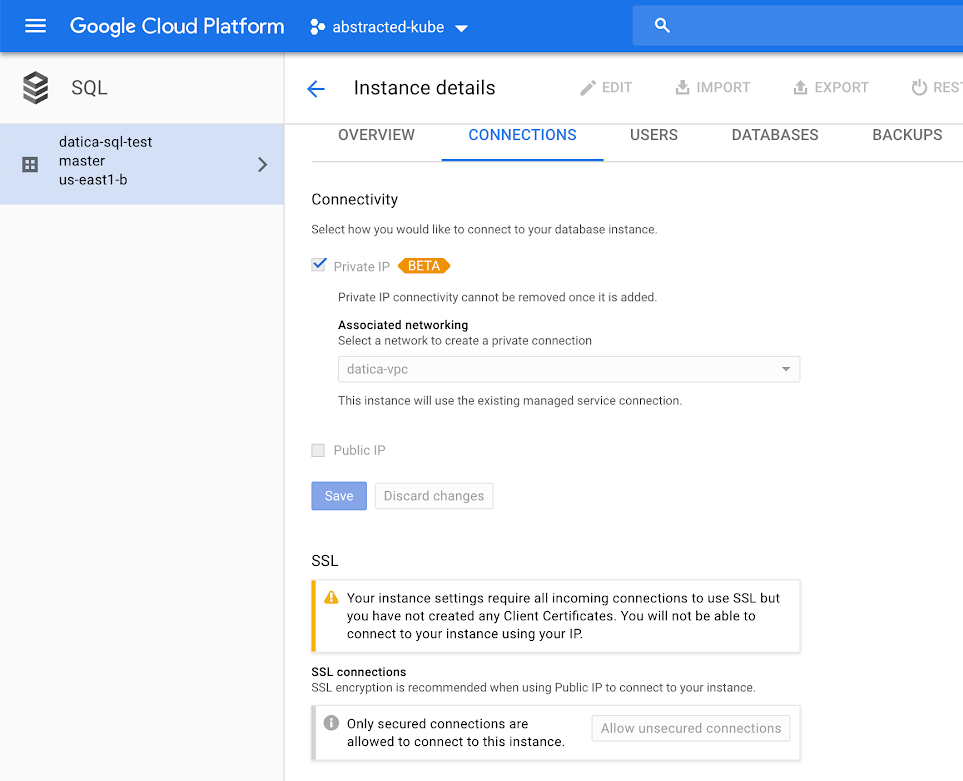
You can see in the screenshot above that all incoming connections must use SSL and also that we haven’t set up a certificate yet, which is covered in the guide below. For the purposes of this guide, SSL/TLS is not optional. To enforce a secure connection, follow this guide.
| Related Control(s) | API Reference |
|---|---|
| HITRUST 0605.10h1 System.12 | Instances, Databases: get |
| HITRUST 0630.10h2 System.6 | Instances, Databases: get |
| HITRUST 0805.01m1 Organizational.12 | Instances, Databases: get |
| HITRUST 0806.01m2 Organizational.12356 | Instances, Databases: get |
| HITRUST 0805.01m1 Organizational.12 | Instances, Databases: get |
| HITRUST 0806.01m2 Organizational.12356 | Instances, Databases: get |
| HITRUST 0814.01n1 Organizational.12 | Instances, Databases: get |
| HITRUST 0816.01w1 System.1 | Instances, Databases: get |
| HITRUST 0835.09n1 Organizational.1 | Instances, Databases: get |
| HITRUST 0859.09m1 Organizational.78 | Instances, Databases: get |
Enabling Encryption
From Google:
“Cloud Storage always encrypts your data on the server side, before it is written to disk, at no additional charge.”
For more information on encryption from GCP, please see this guide.
| Related Control(s) | API Reference |
|---|---|
| HITRUST 0903.10f1 Organizational.1 | Instances |
| HITRUST 1132.01v2 System.3 | Instances |
| HITRUST 1903.06d1 Organizational.3456711 | Instances |
Backups
In step 3 when we created our database, we selected “Automate backups” in the “Enable auto backups and high availability” section. These backups are available and should be configured according to your internal compliance policy. Using the GCP APIs you can set and retrieve configuration information about your instance.
Example response:
{
  "kind": "sql#backupRun",
  "id": long,
  "selfLink": string,
  "instance": string,
  "description": string,
  "windowStartTime": datetime,
  "status": string,
  "type": string,
  "enqueuedTime": datetime,
  "startTime": datetime,
  "endTime": datetime,
  "error": {
    "kind": "sql#operationError",
    "code": string,
    "message": string
  }
}
| Related Control(s) | API Reference |
|---|---|
| HITRUST 1616.09l1 Organizational.16 | Instances, BackupRuns |
| HITRUST 1618.09l1 Organizational.45 | Instances, BackupRuns |
| HITRUST 1619.09l1 Organizational.7 | Instances, BackupRuns |
| HITRUST 1620.09l1 Organizational.8 | Instances, BackupRuns |
| HITRUST 1668.12d1 Organizational.67 | Instances, BackupRuns |
Patching
In step 3 when we created our database, we selected our maintenance window by setting a specific day and time for updates. Using the Instances API, we can expect a response like the following:
"maintenanceWindow": {
  "kind": "sql#maintenanceWindow",
  "hour": integer,
  "day": integer,
  "updateTrack": string
}
| Related Control(s) | API Reference |
|---|---|
| HITRUST 0701.07a1 Organizational.12 | Instances |
| HITRUST 0707.10b2 System.1 | Instances |
| HITRUST 0708.10b2 System.2 | Instances |
| HITRUST 0709.10m1 Organizational.1 | Instances |
| HITRUST 0720.07a1 Organizational.4 | Instances |
| HITRUST 0723.07a1 Organizational.8 | Instances |
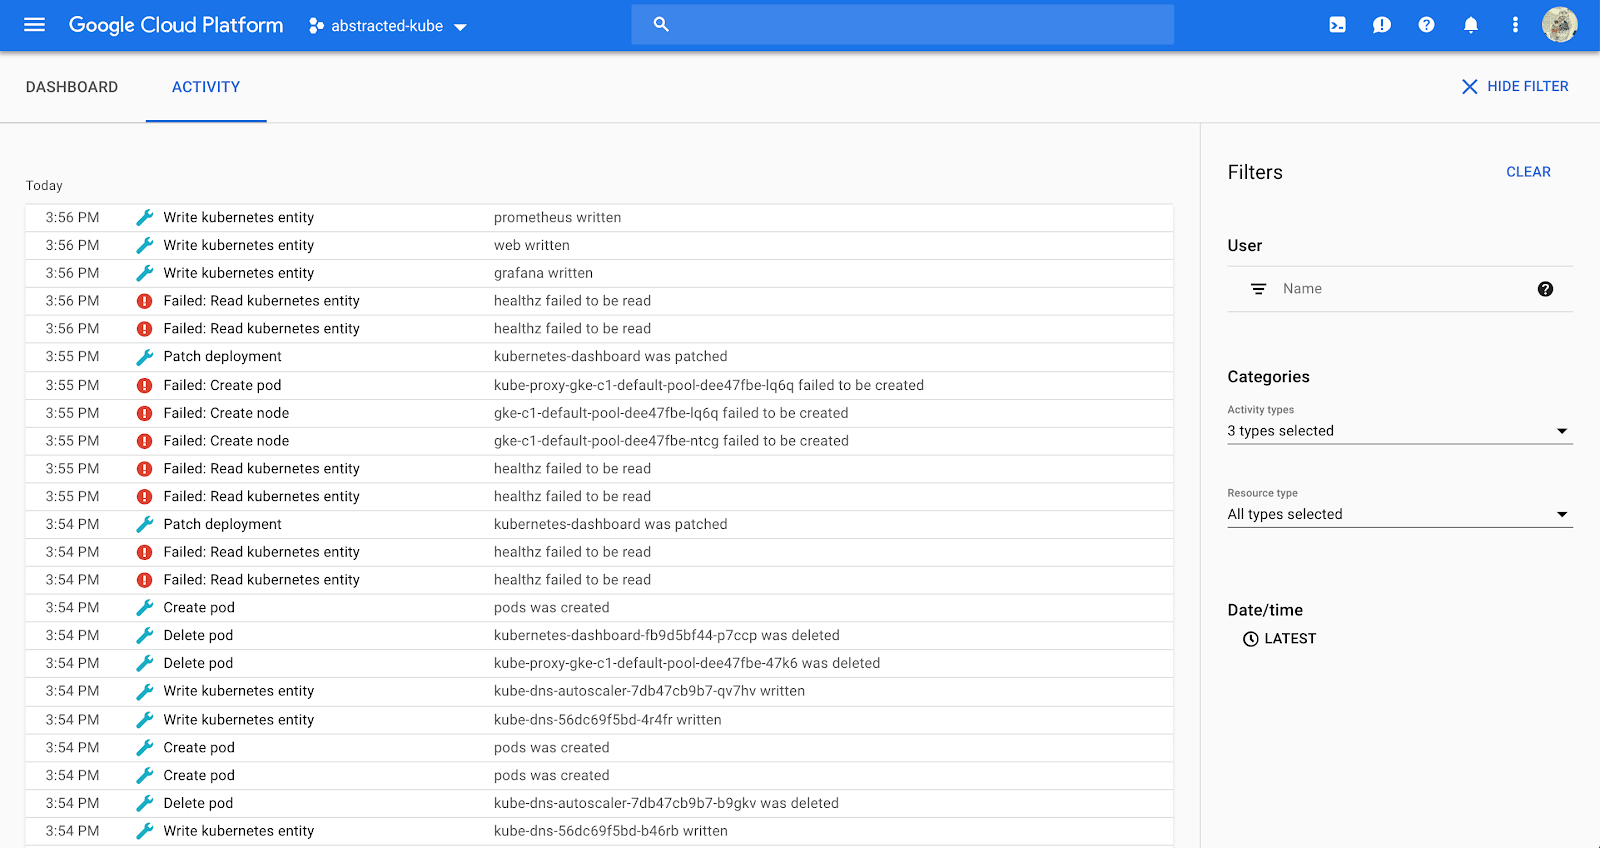
Logging & Monitoring
Using stackdriver in the GCP console, we can see that logging and monitoring are on by default and are tracking events in the “operations” tab. However, this still doesn’t get us all the way to HITRUST alignment. For auditing, we’re going to be using Google Cloud Audit Logging.
Fortunately Cloud Audit Logging is on by default, and can be accessed at console.cloud.google.com/home/activity. If you navigate to that page, you’ll see a log of activity, with options in the right menu to filter based on certain criteria.
| Related Control(s) | API Reference |
|---|---|
| HITRUST 1204.09aa1 System.3 | Stackdriver Monitoring API |
Wrapping up
Using this guide, developers can ensure their new GCP Cloud SQL instance is ready to comply with the HITRUST CSF. Maintaining these configurations for all new infrastructure, updating them for new versions of HITRUST and providing proof — a digital papertrail — is an incredible amount of work. Having a partner like Datica can mean the difference between an audit taking 4 months, or 4 weeks.
For more information on Datica’s products and services. Check out these helpful links: