
Disclaimer: while utilizing these guides can provide alignment with HITRUST, it is still your responsibility as an organization to complete an audit and obtain certification.
Ensuring you have a signed Business Associate Agreement (BAA)
First and foremost, you’ll need a BAA in place with AWS before configuring any service (and subsequently accepting PHI). AWS maintains a list of services that are covered under their BAA here (RDS included). If you haven’t signed a BAA already with AWS, please see the steps below. If you already have a BAA with AWS, simply move on to step 2.
More information on BAAs from AWS can be found here.
To sign the AWS BAA…
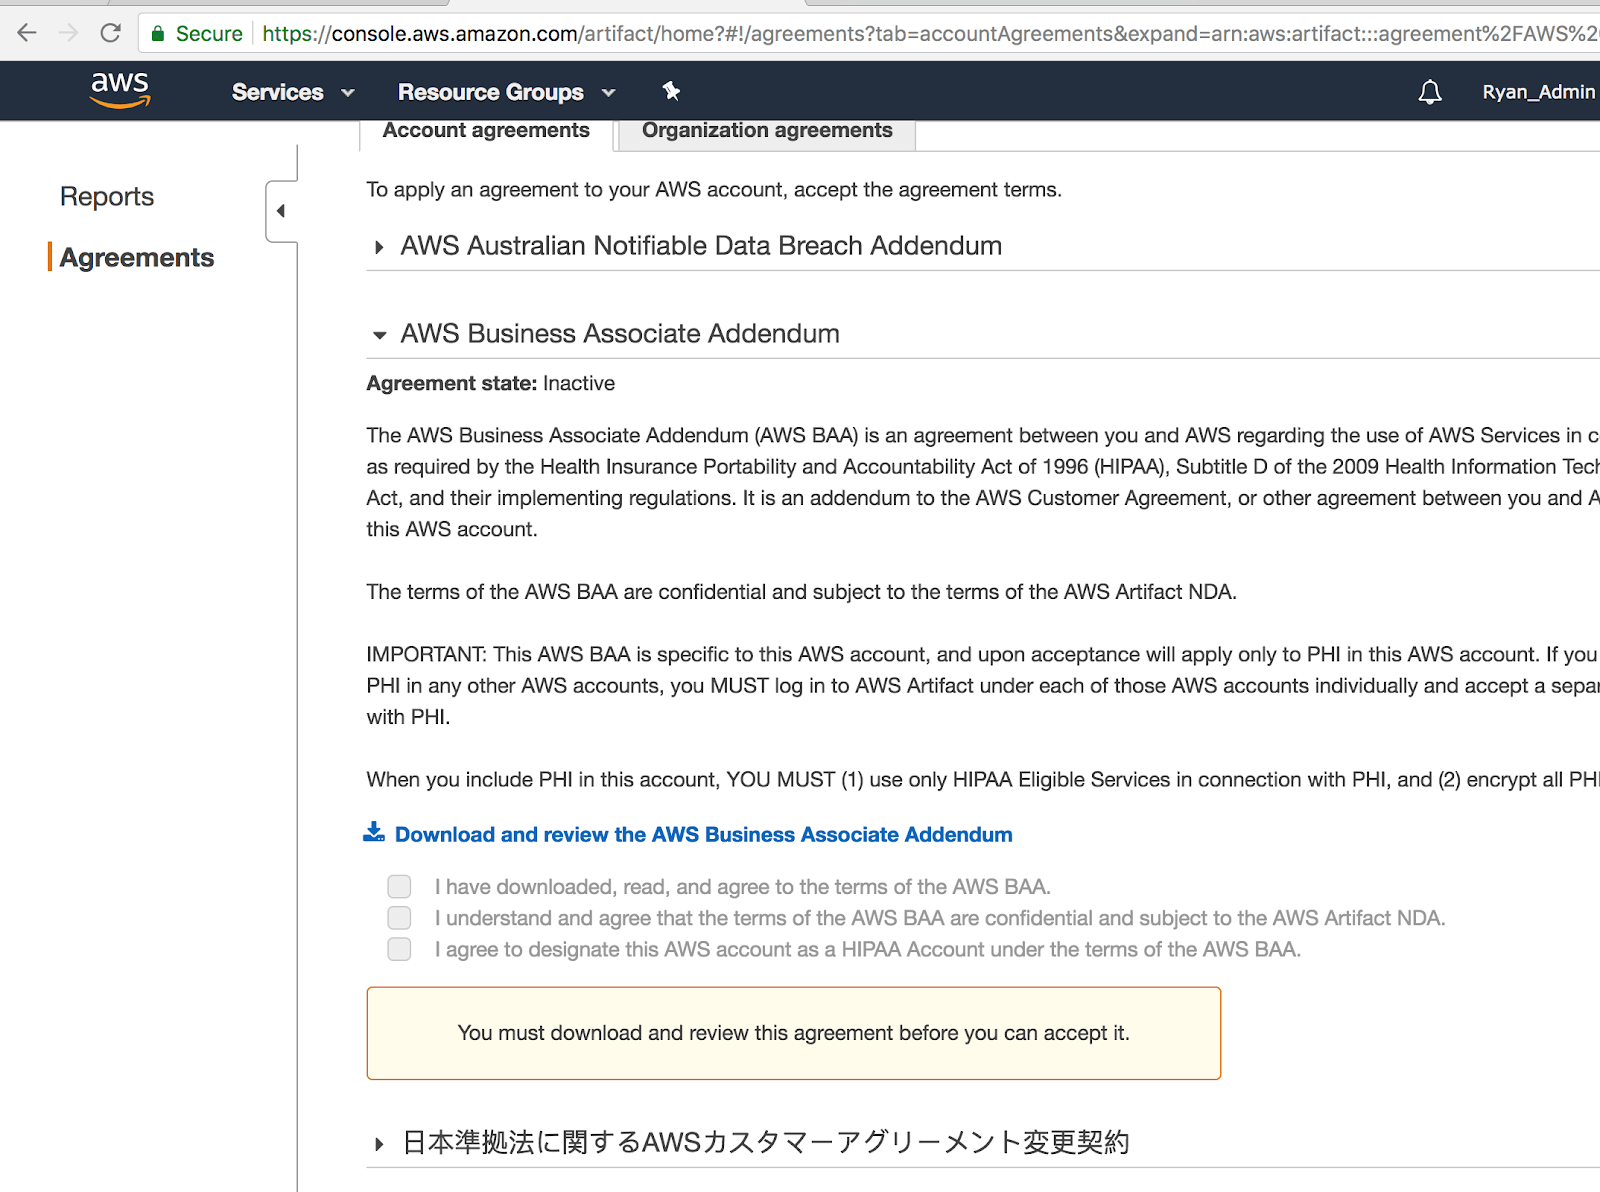
- Navigate to https://console.aws.amazon.com/artifact/
- Select the “AWS Business Associate Addendum” section
- Download the AWS Business Associate Addendum
- Confirm you’ve followed the steps properly by checking the three boxes show on the screen
- Click the button that says “Accept the AWS Business Associate Addendum for this account”
- You now have a BAA in place with AWS
Rule
HIPAA § 164.308. AWS does not provide API access to their Artifact service.
Selecting a database version
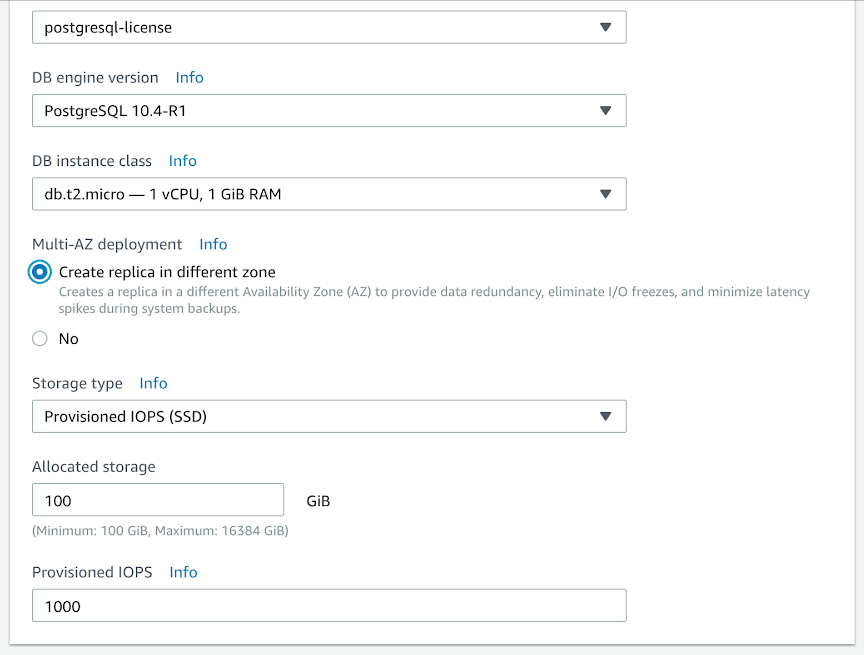
Because AWS RDS offers various versions of each database, it’s imperative from a compliance and security perspective that you select a known good patched version, and one that will continue to receive updates and patches in the future (using versions no older than 3 previous versions is typically a safe bet).

Create new subnet group
From AWS:
“Subnets are segments of a VPC’s IP address range that you designate to group your resources based on security and operational needs. A DB subnet group is a collection of subnets (typically private) that you create in a VPC and that you then designate for your DB instances. A DB subnet group allows you to specify a particular VPC when creating DB instances using the CLI or API; if you use the console, you can just select the VPC and subnets you want to use.”
How to create a new subnet group:
- Search for or choose “RDS” in the AWS console (or if you’re following along in this guide find the “Subnet group” link in the left side navigation).
- Select the “Subnet group” link if you haven’t already
- Select “Create DB Subnet Group”
- Complete the information for name and description
- Select your VPC and all subnets related to this VPC
- Select “Create”
Related Rule
HITRUST 0805.01m1 Organizational.12 API Documentation: DescribeDBSubnetGroups
Enable multi-AZ
When creating your new RDS instance, ensure you have selected “Create replica in different zone” as high availability and replication is critical to businesses handling PHI — you’ll also see in the table below the relevance to various required HITRUST controls.
Related Controls
- HITRUST 1616.09l1 Organizational.16
- HITRUST 1618.09l1 Organizational.45
- HITRUST 1619.09l1 Organizational.7
- HITRUST 1620.09l1 Organizational.8
- HITRUST 1668.12d1 Organizational.67
API Documentation: DescribeDBSubnetGroups
Network segregation
Communication should be restricted to the same network as the RDS VPC. Allowing access from other networks may still be compliant but should be kept to a minimum and monitored closely by network engineers.
Related Controls
- HITRUST CSF v8.1 - 0605.10h1 System.12
- HITRUST CSF v8.1 - 0630.10h2 System.6
- HITRUST CSF v8.1 - 0805.01m1 Organizational.12
- HITRUST CSF v8.1 - 0806.01m2 Organizational.12356
API Documentation:
2. DescribeVpcs
Turn off public access
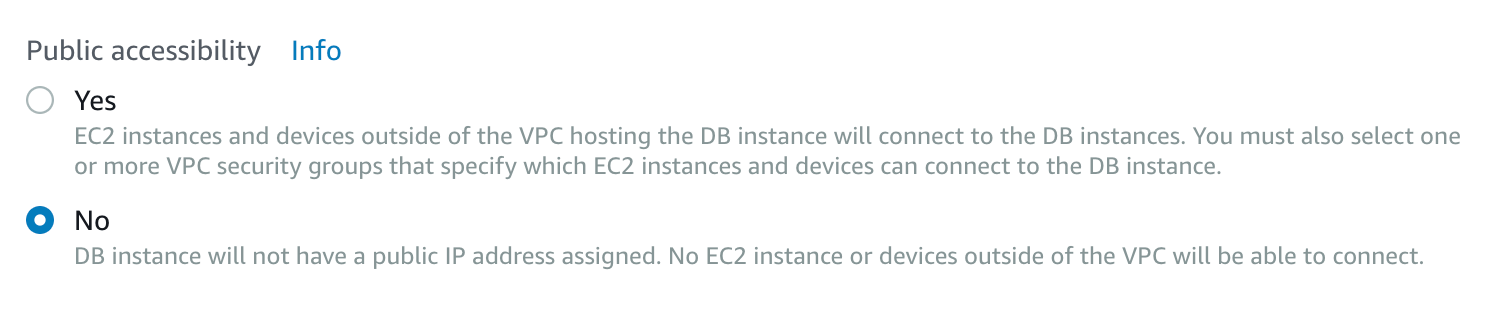
It should go without saying, but we’ll say it anyway: providing public, unauthorized, access to PHI (either directly or indirectly) is a violation of HIPAA, HITRUST, and several other regimes. Ensuring your RDS instance has public access turned off is critical.
To turn off public access do the following:
- If you’re already in the RDS console and following along as you create a new instance, on Step 3 of creation, select “No” under the “Public accessibility” field

- …or if you have an instance already, simply click the “Instances” link in the left side navigation from the main RDS console
- Select the RDS instance you want
- Once you have the instance selected, click the “Modify” button on the top right
- Then scroll to the “Network & Security” security section — here you will find the “Public accessibility” option
- Select “No”
Related Controls
- HITRUST 1616.09l1 Organizational.16
- HITRUST 1618.09l1 Organizational.45
- HITRUST 1619.09l1 Organizational.7
- HITRUST 1620.09l1 Organizational.8
- HITRUST 1668.12d1 Organizational.67
API Documentation: DescribeDBSubnetGroups
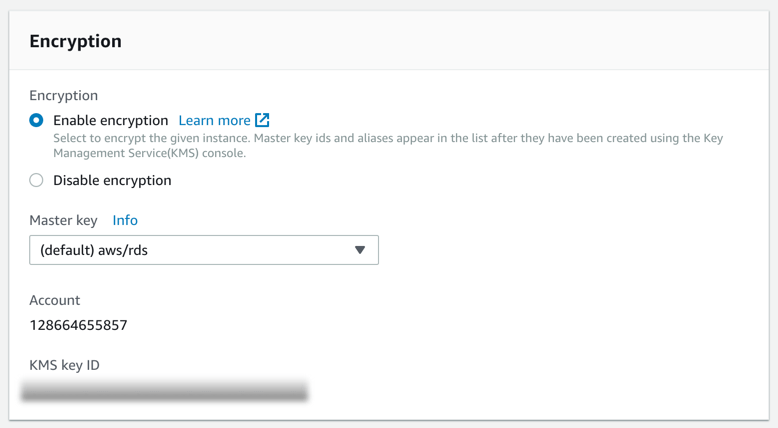
Enable encryption
Encryption is perhaps the most important of all controls that need to be in place on your database instance(s).
To enable encryption on an RDS instance, follow this guide from AWS.
Related Controls
- HITRUST 0903.10f1 Organizational.1
- HITRUST 1132.01v2 System.3
- HITRUST 1903.06d1 Organizational.3456711
API Documentation: DBInstance
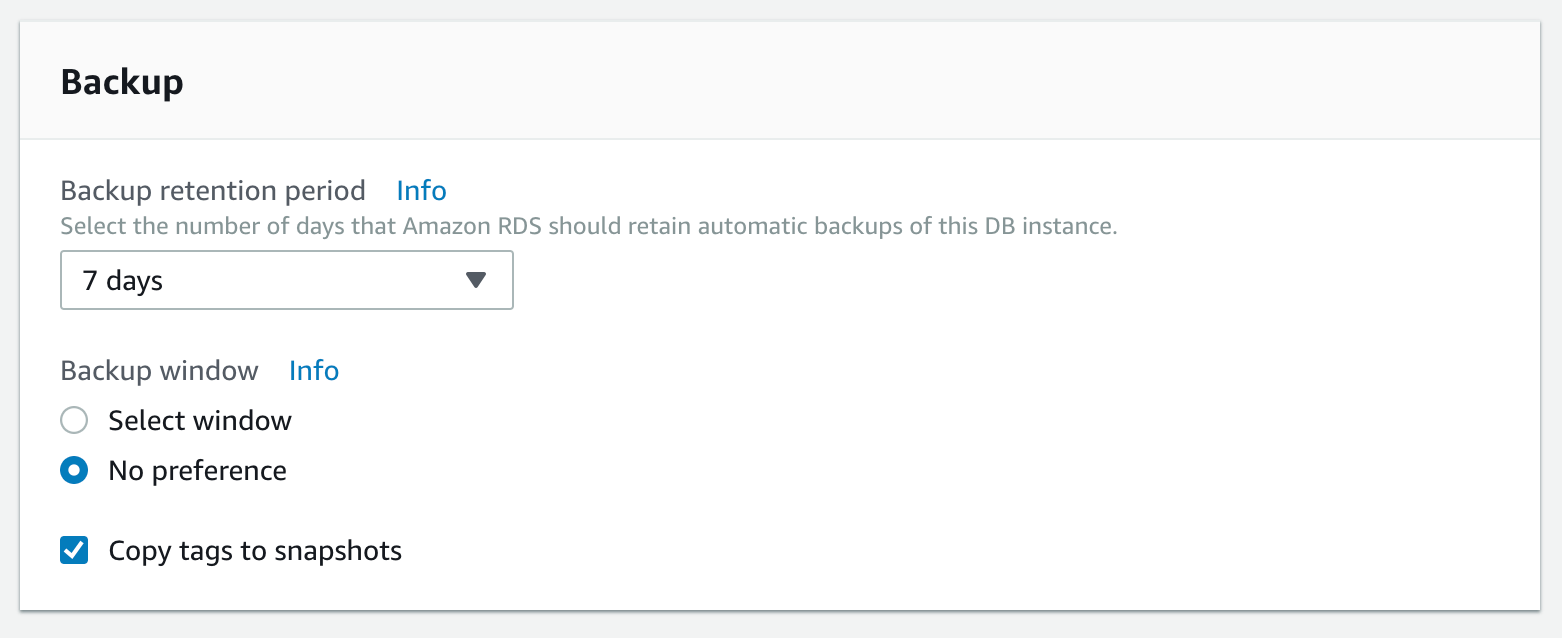
Working with backups
From AWS:
“By default, Amazon RDS creates and saves automated backups of your DB instance securely in Amazon S3 for a user-specified retention period.”
If you’ve already set up an RDS instance without specifying the backup period, AWS states:
“You can set the backup retention period when you create a DB instance. If you don’t set the backup retention period, the default backup retention period is one day if you create the DB instance using the Amazon RDS API or the AWS CLI, or seven days if you create the DB instance using the AWS Console”
To set the retention period when creating a new RDS instance, follow these steps:
- Navigate to your RDS console
- Select “Instances”
- Select “Create database”
- Go through the several steps, stop once you’re on the “Configure advanced settings” page
- Scroll to the “Backup” section and select your desired preferences
Related Controls
- HITRUST 1616.09l1 Organizational.16
- HITRUST 1618.09l1 Organizational.45
- HITRUST 1619.09l1 Organizational.7
- HITRUST 1620.09l1 Organizational.8
- HITRUST 1668.12d1 Organizational.67
API Documentation: DBInstance
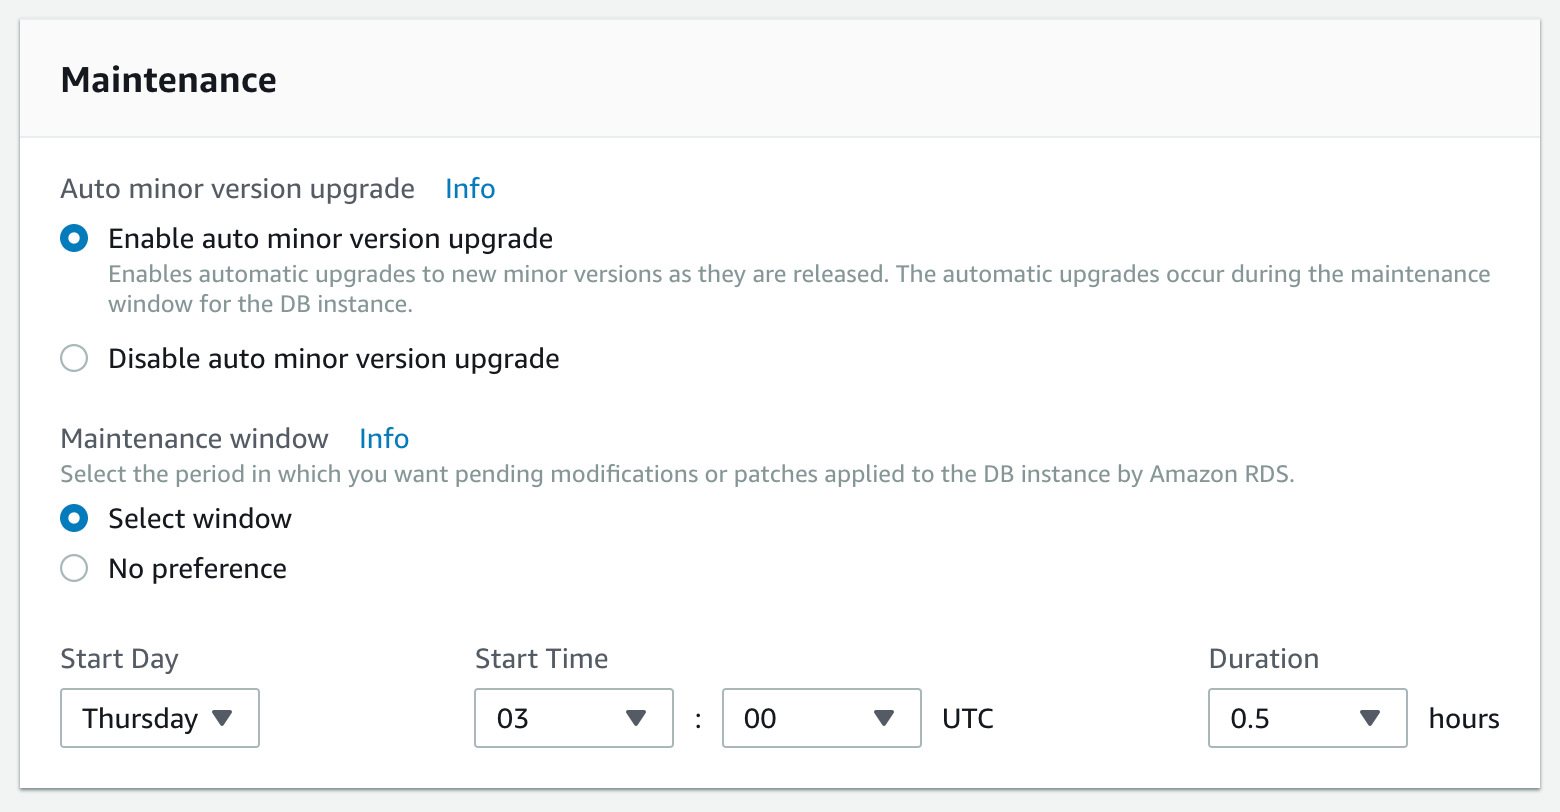
Patching schedule
Managing vulnerabilities is a burden for users. Luckily, AWS provides maintenance as part of the RDS instance. In the “Maintenance” section on the “Configure advanced settings” step of creating an RDS instance, you’ll see two options:
- Auto minor version upgrade — You should set this to “Enable auto minor version upgrade”
- Maintenance window — For policy purposes, you’ll want/need to select a specific window. Recommendations on day and time will vary drastically depending on your location, business, and several other factors
Related Controls
- HITRUST 0701.07a1 Organizational.12
- HITRUST 0707.10b2 System.1
- HITRUST 0708.10b2 System.2
- HITRUST 0709.10m1 Organizational.1
- HITRUST 0720.07a1 Organizational.4
- HITRUST 0723.07a1 Organizational.8
API Documentation: GetMaintenanceWindow
Working with SSL
“Encrypting everything” is often the most difficult aspect of complying with frameworks like HITRUST CSF. Ensuring that your connections to RDS are encrypted is a fundamental requirement. The best way to enforce encryption for your RDS instance is to force all connections to use SSL.
The steps required to enforcing SSL on your database will vary depending on your database of choice. For more information and step by step guides, see the following articles from AWS:
Related Controls
- HITRUST 0805.01m1 Organizational.12
- HITRUST 0806.01m2 Organizational.12356
- HITRUST 0814.01n1 Organizational.12
- HITRUST 0816.01w1 System.1
- HITRUST 0835.09n1 Organizational.1
- HITRUST 0859.09m1 Organizational.78
Amazon has no related API reference at this time.
Audit Logging & Monitoring
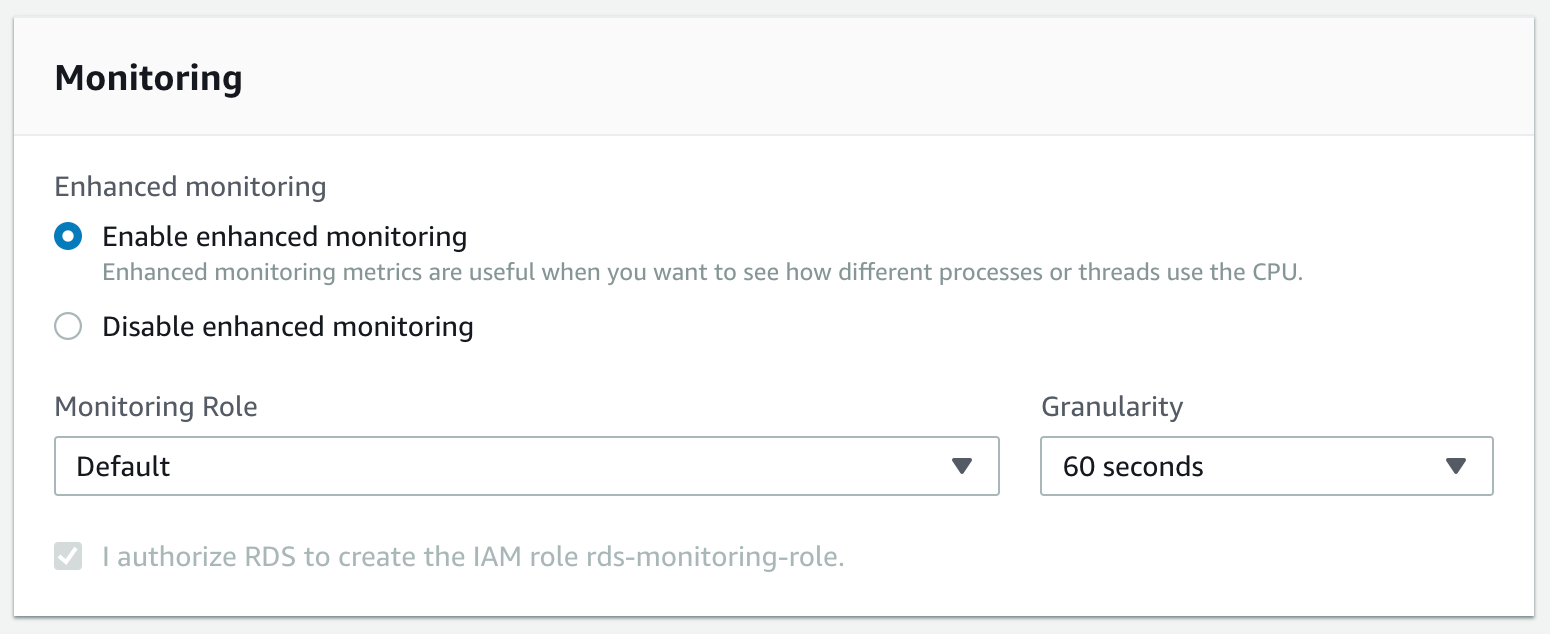
Monitoring
Enhanced monitoring can be turned on for RDS at time of creation. On the “Configure advanced settings” step, find the “Monitoring” section and select “Enable enhanced monitoring”.
Logging
From AWS:
“RDS PostgreSQL generates query and error logs. We write auto-vacuum info and rds_admin actions to the error log”
AWS has several articles detailing how logging and monitoring work together to give you transparency into your instance. For more information, see this guide from AWS.
Related HITRUST CSF v8.1 Control(s)
Related Controls
The API references for DBInstance and DescribeDBLogFiles cover the following controls:
- 1202.09aa1 System.1
- 1203.09aa1 System.2
- 1204.09aa1 System.3
- 1205.09aa2 System.1
- 1206.09aa2 System.23
- 1207.09aa2 System.4
- 12100.09ab2 System.15
- 1212.09ab1 System.1
- 1213.09ab2 System.128
- 1229.09c1 Organizational.1
- 1270.09ad1 System.12
Wrapping up
Using this guide, developers can ensure their new RDS instance is ready to comply with the HITRUST CSF. Maintaining these configurations for all new infrastructure, updating them for new versions of HITRUST and providing proof — a digital papertrail — is an incredible amount of work. Having a partner like Datica can mean the difference between an audit taking 4 months, or 4 weeks.
For more information on Datica’s products and services. Check out these helpful links: