Disclaimer: while utilizing these guides can provide alignment with HITRUST, it is still your responsibility as an organization to complete an audit and obtain certification.
The Business Associate Agreement (BAA)
From Microsoft:
“To help customers comply with HIPAA and the HITECH Act, Microsoft includes execution of the HIPAA BAA as part of a customer’s volume licensing agreement, which includes any agreement that incorporates the Online Services Terms by reference. The BAA (full text of which is available at http://aka.ms/BAA) applies to a customer that is a “covered entity” or a “business associate” and includes “protected health information” in Customer Data. Microsoft currently offers the BAA for the services listed in the Scope section below.”
Microsoft does not provide programmatic access to their BAA (at least none that we could find). To double check that you do in fact have a BAA in place with Microsoft, it’s recommended that you reach out to your Azure rep (or Azure support if you do not have a rep).
More general tips on BAAs here.
| HIPAA Rule | API Reference |
|---|---|
| HIPAA § 164.308 | N/A: Azure does not provide API access to the BAA |
Creating the database
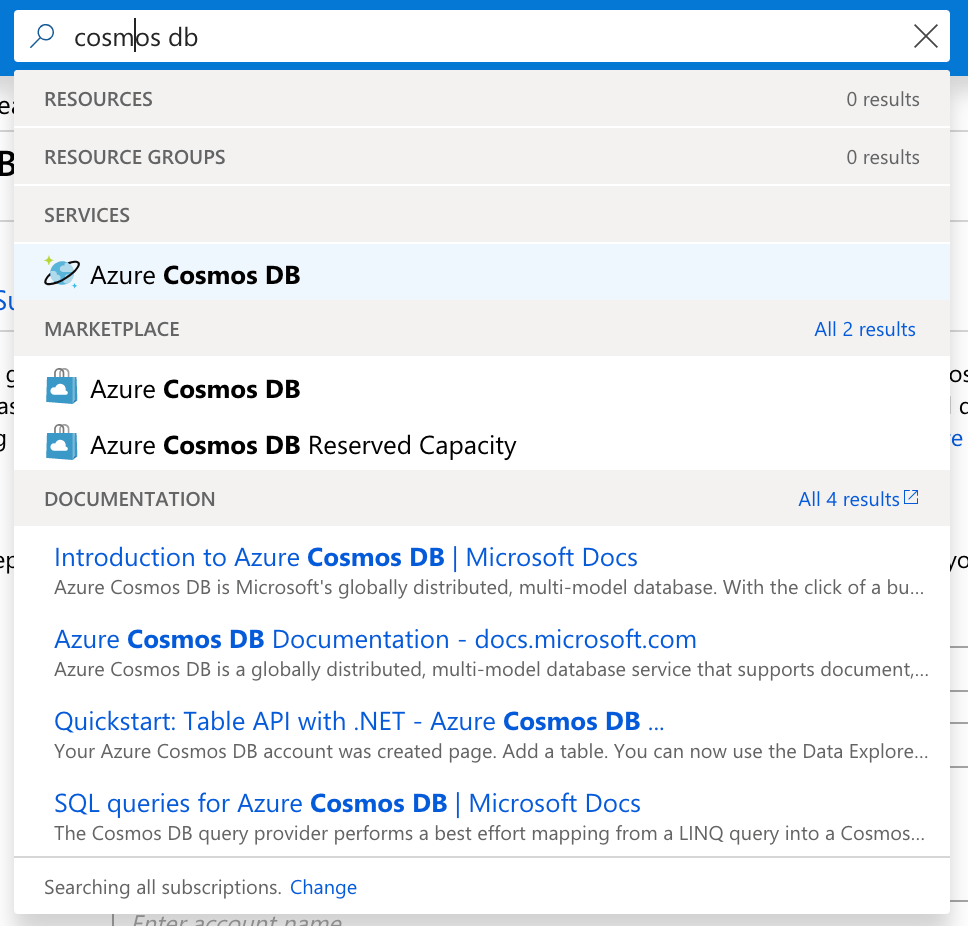
Inside of the Azure portal, find the search bar and type “Cosmos DB”. Once the results populate, click the “Azure Cosmos DB” service in the list.
For compliant services, it’s recommended that you create a new resource group, or, if you have other compliant services, that you keep them together. The rule of thumb here is that services touching PHI should be separate from services not touching PHI.
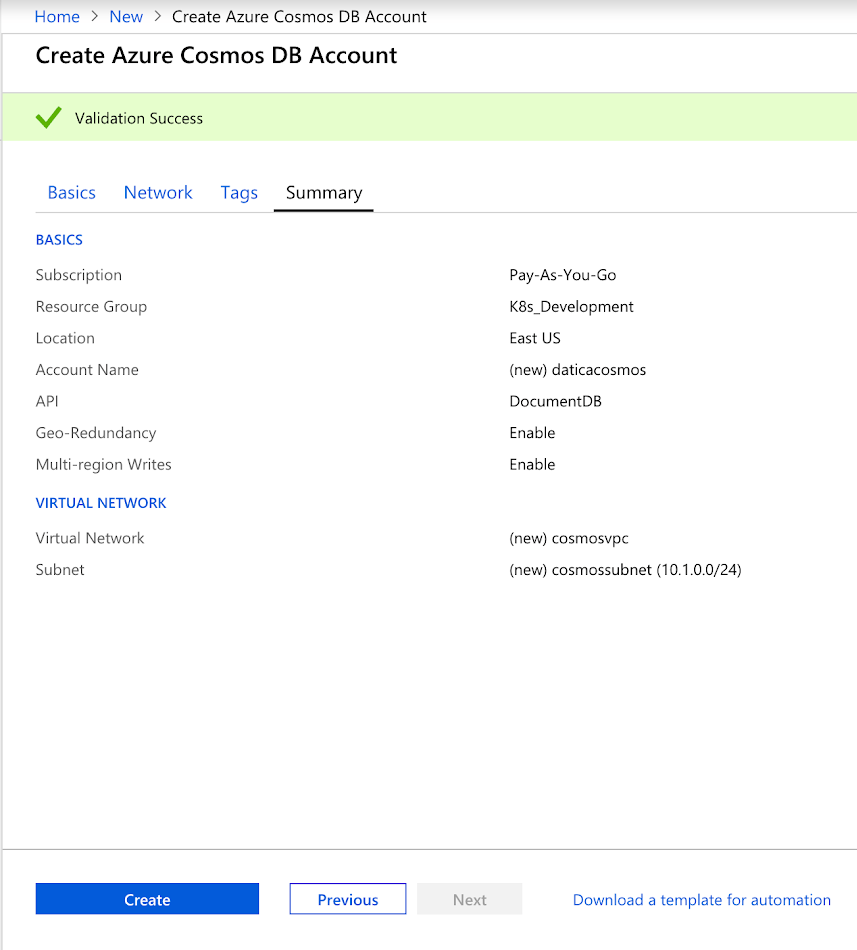
Once you’re inside the “Create Azure Cosmos DB Account” page, follow below:
- Select your subscription and associated resource group
- Give the instance a name (“Account name”)
- Select your API
- Select the location in which you want the service to live. It’s recommended that you keep it in the same location with the other services that will be interacting with it
- Ensure both “Geo-Redundancy” and “Multi-region Writes” are enabled
- Click “Next: Network”
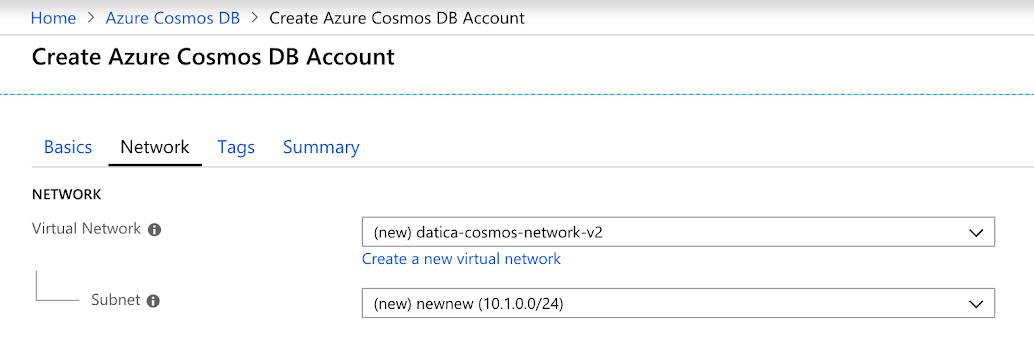
- On the network tab, we can see that we have the option to create a network. Click the “Create a new virtual network” link. In the right sidebar, give your new network a name. We’ll also want to create a new subnet. Pick a name and IP address in CIDR notation.
Follow the rest of the steps for database setup and finish creation.
Networking
In Step 2 above we created a new VPC as well as a subnet. See the reference below to see how to check this via the Azure REST API and how it relates to HITRUST.
| Related Control(s) | API Reference |
|---|---|
| HITRUST 0805.01m1 Organizational.12 | Subnets |
Redundancy
In Step 2 above we created a database with several configurations. Two of those configurations were enabling both “Geo-Redundancy” and “Multi-region Writes”. To interact with these configurations, see the API reference below.
| Related Control(s) | API Reference |
|---|---|
| HITRUST 1616.09l1 Organizational.16 | Get a Database |
| HITRUST 1618.09l1 Organizational.45 | Get a Database |
| HITRUST 1619.09l1 Organizational.7 | Get a Database |
| HITRUST 1620.09l1 Organizational.8 | Get a Database |
| HITRUST 1668.12d1 Organizational.67 | Get a Database |
Access
Gating access to your database is imperative to achieving compliance. Cosmos DB supports a concept called “Service Endpoints”. From Azure:
“Virtual Network (VNet) service endpoints extend your virtual network private address space and the identity of your VNet to the Azure services, over a direct connection. Endpoints allow you to secure your critical Azure service resources to only your virtual networks. Traffic from your VNet to the Azure service always remains on the Microsoft Azure backbone network.”
Azure provides a step by step guide to for securing access to an Azure Cosmos DB account by using Azure Virtual Network service endpoint, so instead of rehashing those steps here, you should follow that guide. Those settings, if done correctly, will ensure your database is only being accessed by approved services within your Azure account.
| Related Control(s) | API Reference |
|---|---|
| HITRUST 0605.10h1 System.12 | Security Rules, Public IP Addresses, Virtual Networks, Available Endpoint Services |
| HITRUST 0630.10h2 System.6 | Security Rules, Public IP Addresses, Virtual Networks, Available Endpoint Services |
| HITRUST 0805.01m1 Organizational.12 | Security Rules, Public IP Addresses, Virtual Networks, Available Endpoint Services |
| HITRUST 0806.01m2 Organizational.12356 | Security Rules, Public IP Addresses, Virtual Networks, Available Endpoint Services |
Encryption
From Azure:
“As a PaaS service, Cosmos DB is very easy to use. Because all user data stored in Cosmos DB is encrypted at rest and in transport, you don’t have to take any action.”
For more information on how encryption at rest is implemented for Cosmos DB, see this article.
Ensuring encryption is on everywhere:
For encryption and access not already covered in step 5, see this guide from Azure on securing point access to your Cosmos DB instance.
| Related Control(s) | API Reference |
|---|---|
| HITRUST 0903.10f1 Organizational.1 | Cosmos DB has encryption turned on by default; to turn on enctyption everywhere else: Virtual Networks, Available Endpoint Services |
| HITRUST 1132.01v2 System.3 | Cosmos DB has encryption turned on by default; to turn on enctyption everywhere else: Virtual Networks, Available Endpoint Services |
| HITRUST 1903.06d1 Organizational.3456711 | Cosmos DB has encryption turned on by default; to turn on enctyption everywhere else: Virtual Networks, Available Endpoint Services |
Backups
Azure provides automatic backups for Cosmos DB without the need to configure any settings. However, working with those backups, and attesting to their availability can be cumbersome. From Azure:
“All your backups are stored separately in another storage service, and those backups are globally replicated for resiliency against regional disasters. The automatic backups are intended for scenarios when you accidentally delete your Cosmos DB container and later require data recovery or a disaster recovery solution.”
| Related Control(s) | API Reference |
|---|---|
| HITRUST 1616.09l1 Organizational.16 | N/A |
| HITRUST 1618.09l1 Organizational.45 | N/A |
| HITRUST 1619.09l1 Organizational.7 | N/A |
| HITRUST 1620.09l1 Organizational.8 | N/A |
| HITRUST 1668.12d1 Organizational.67 | N/A |
Logging & Monitoring
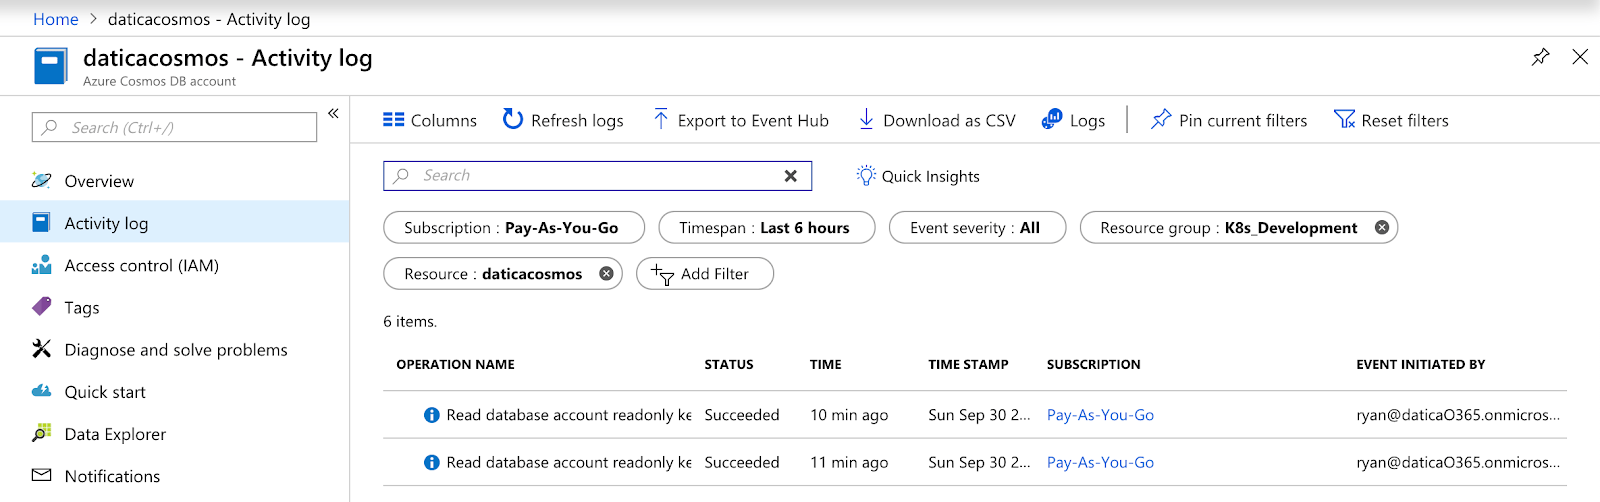
Inside of the Azure Cosmos DB portal, you’ll find a link in the left side navigation that reads “Activity log”, this is where you’ll see an audit log of various activity performed on the instance.
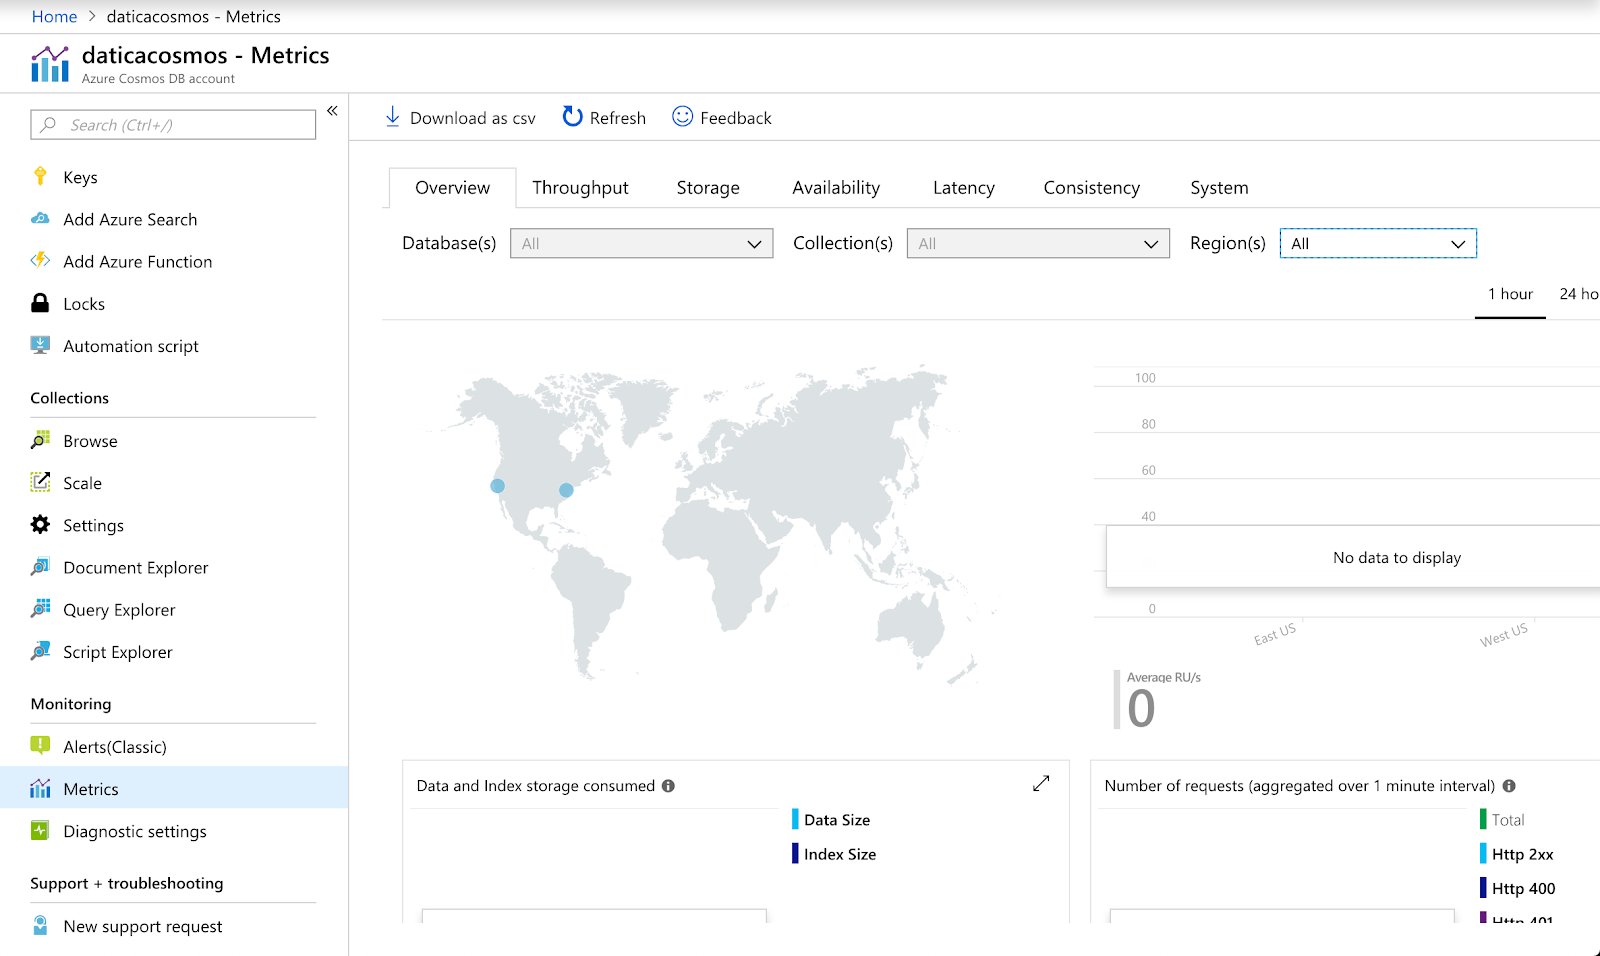
Monitoring on the other hand has its own section, where you can see specific metrics about the instance, configure alerts, and run diagnostics.
| Related Control(s) | API Reference |
|---|---|
| HITRUST 1204.09aa1 System.3 | Monitoring REST API Reference |
Wrapping up
Using this guide, developers can ensure their new Cosmos DB instance is ready to comply with the HITRUST CSF. Maintaining these configurations for all new infrastructure, updating them for new versions of HITRUST and providing proof — a digital papertrail — is an incredible amount of work. Having a partner like Datica can mean the difference between an audit taking 4 months, or 4 weeks.
For more information on Datica’s products and services. Check out these helpful links: